CarPC build part 1: hardware
This is the first part of building a RaspberryPi powered carpc.
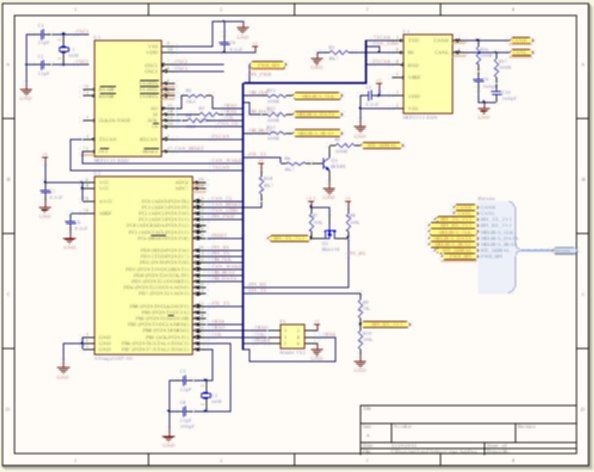
Over a course of few months (been busy with, eh, life) I've designed the first iteration of custom Atmega-based circuit which lets me interface with car's electronics.
The main part of schematics (pdf)
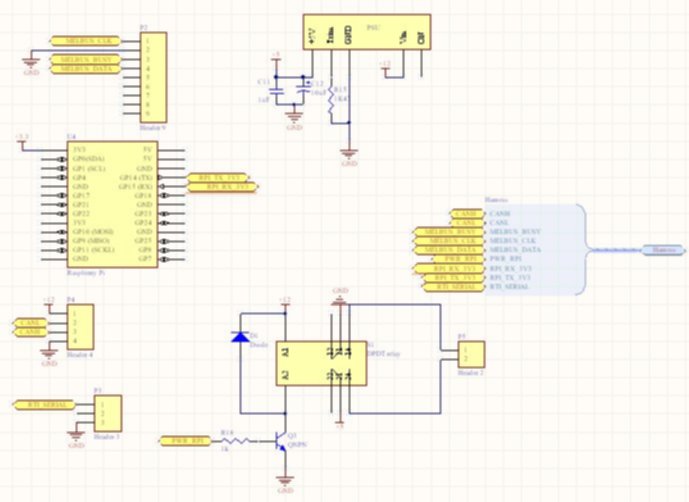
Second page with power supply and connectors
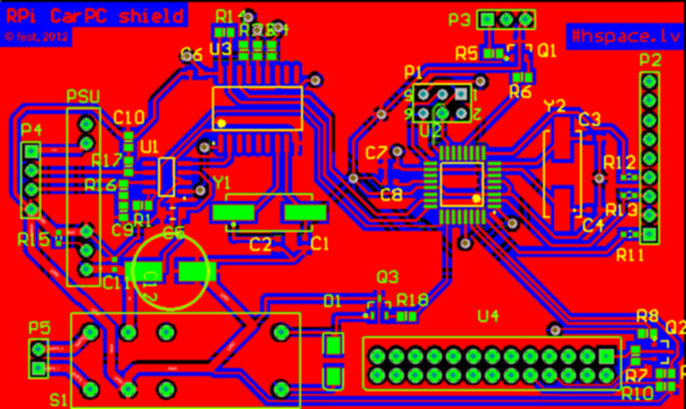
After some tedious hours of routing, I came up with double-sided PCB with quite a few SMD parts (don't like the drilling, eh).
Then comes the procution of PCB. I had experimented with ethcing PCB's at home but I had never tried to etch a PCB that complicate. The process I used can be called- extremely cheap. Photoresist coated PCB from local supplier. Halogen-floodlight with cheapest possible lamp for exposing (cheap lamps give enough UV to expose a single side in 10 minutes). More expensive lamps from proper manufacturers have UV filters in them but the far-east manufacturers don't seem to care- lucky for us.
Developing PCB turned out quite well- instead of specialized bag of chemical developer powder (NaOH, actually) I used a drain-cleaner. Have a look for drain-cleaner which states it's contents on the bottle- you're only interested in the ones which have only two components: NaOH (or caustic soda) and water.
As for the etching- I went with FeCL~3~ as I have a plenty of it already.
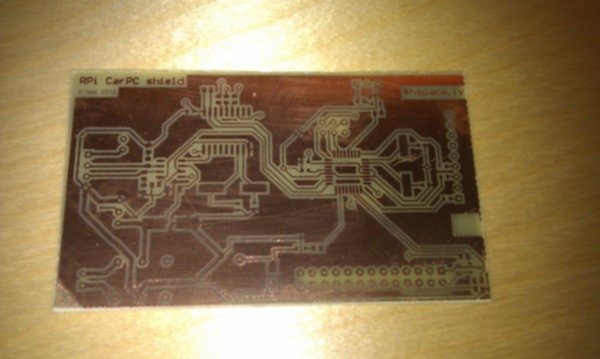
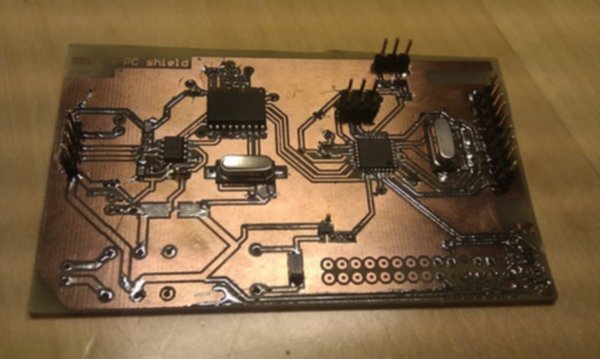
Out of the etchant came this beauty:
On the next day, I realized I had made three mistakes:
-
It's crucial to completely stop etching process. Some advise tinning with solder, some- bathing in soap-water. It's really important to do it right away- on the next day some of the smaller traces were already broken.
-
I accidentaly selected 0603 package for resistors though I only had them in 0805 package. 0805 resistors can be soldered on pads created for 0603, but the result is not pretty.
- When the holes are not metal-plated, it's next-to impossible to solder connectors to the top layer traces. For home etching it's best to route traces in a way that connectors can be only soldered from the bottom layer.
I didn't want to ruin DC-DC converter, so I'll probably populate it last. ICSP header works correctly and I'm now debugging the hardware to see if it works as intended.
This part is put on hold at this point until I finish debugging hardware and software.
Comments